With its unique, succulent leaves and healing properties, aloe vera is a joy to grow at home. These plants typically have a very long lifespan in plant years, but sometimes things happen that make you worry your aloe might suffer a premature death.
The most common causes for an aloe plant dying are overwatering and excessive soil moisture. Other reasons include:
- Under-watering
- Incorrect light exposure
- Low ambient temperatures
- Excessive fertilizing
- Pest infestations
- Poor soil conditions
Aloe is a resilient plant, and in many cases, it can recover from trauma if given the right care.
In this article, you’ll learn about the reasons that your plant might be in danger and how to save a dying aloe vera plant. We’ll also answer some common questions about aloe care and growth.
Let’s dive in and get your aloe back in healthy shape!
Table of Contents
1. Overwatered Aloe Plant
Unfortunately, overwatering is a very common problem with aloe vera. If you’re watering your plant more often than every 10 days or so, it’s likely too much.
Aloe vera is native to dry, harsh desert climates, and it is a member of the succulent plant family. This means that it stores water in its leaves for use later on. That’s why the leaves are so thick and chunky- they’re full of water.
Because of this, aloe does best in soil that dries out almost completely between waterings, which mimics its arid native habitat. When there’s too much moisture in the soil, you can start running into serious problems from root rot.
Root rot is a potentially serious condition where moisture-loving fungus takes hold in wet soil, attacking the roots and blocking your plant from absorbing nutrients, water and oxygen. If you don’t catch it early enough, root rot can kill your aloe plant.
Here are some signs that you may have a root problem:
- Drooping leaves
- Leaf yellowing
- Leaves turning brown ur rust colored on the edges
- Dark, squishy leaf sections near the plant’s base
- Brown sections on the lower parts of the outer leaves
To give you an example of what healthy aloe vera roots should look like, I took this photo when I repotted my own aloe plant:

See how the stem is white and the roots are solid with no mushiness? That’s what you want to see. So if you’re noticing brown discoloration and slimy, squishy areas, that’s clear indicator of root rot.
How to Save It: Remove Rotten Sections and Grow New Roots
If you suspect that you may have given too much water and your plant is looking ill, you’ll have to take immediate action:
- Take your aloe out of its pot.
- Remove as much wet soil as you can.
- Check the roots for signs of rot, which can include sections of dark, squishy roots or a bad odor.
- Cut off the damaged root ball.
- Cut away all damaged leaves and stem sections, peeling the rotted sections off until all the brown is gone.
- Allow the plant to dry in the sun for a few days to callous over and stop the rotting process.
Here’s a helpful video from The Aloe Vera Garden that shows what root rot looks like and how to remove it:
The cut stem is able to produce new roots, so your aloe can continue its life and leave root rot behind.
Do this:
- Once the cut end has fully dried out, place your aloe in a shallow layer of fresh soil and a clean pot. Only the cut end should be in contact with the soil, so use sticks, rocks or other bulky items to hold your plant upright.
- After a few weeks, new roots should emerge from the cut stem, and when these grow to about 1 inch long, your plant is ready for planting in soil.
This is a process that makes more sense when you see it rather than just read about it. So here’s another video from The Aloe Vera Garden that shows the regrowing steps in detail:
Going forward, what should your watering schedule to avoid an unhealthy aloe plant? That depends on your home’s humidity levels, temperature and lighting. And watering frequency will increase during the active growing phase (spring and summer months) and as the plant grows larger.
Aloe prefers soil that almost totally dries out between waterings, so how the soil feels is a much better guide for when to water than following a strict schedule.
So the answer to how often to water aloe is: As often as your plant needs it. That doesn’t really narrow it down much, but you’ll just have to do a bit of experimentation for figure out the schedule that works for you.
I water my aloe when the soil feels dry as far as I can stick my finger into the pot. That’s usually about every 10-14 days, and that seems to be working out well for me.
But my plant is still on the small side and in a shallow pot, and 2 inches down is nearly to the pot’s bottom. If your plant is fairly large and in a deep pot, stick your finger through the lower drainage hole to test how the soil feels.
Keeping a watering log is a good idea, especially when you’re trying to help your plant recover from a brush with death. This can as simple as writing down when you checked the soil moisture/gave water on your calendar, or you could use a note-taking app on your phone.
2. An Unsuitable Pot
The pot you have your aloe planted in could be to blame for your aloe plant turning brown, and the main issue again comes down to moisture.
Sometimes the prettiest houseplant pots have zero built-in drainage. This is meant to keep water and soil from damaging your furniture but it can also lead to constantly-damp soil or worse yet, standing water in the pot. That’s a problem for any plant, but it’s particularly problematic for desert plants like aloe vera.
Even if your pot has plenty of built-in drainage, you can still cause a problem with excessive moisture if your plant’s pot is too big.
The larger the pot, the more soil it holds. And this extra soil holds more moisture than your aloe can absorb, leading to (once again) overly damp soil.
How to Save It: Move Your Aloe into an Appropriate Pot
If your pot is guilty of lacking drainage or being too big, you’ll have to create more hospitable conditions for your aloe.
The first option is to repot your plant into a new planter that has at least one large drainage hole built-in. Naturally porous materials, like terra cotta, unglazed ceramic and cement, are the very best materials for aloe plants since they allow moisture to escape and allow air in. However, any material will work as long as you ensure good drainage and water your aloe appropriately.
But what if you really like your pot, even though it lacks drainage? That’s ok- just plant your aloe into a nursery pot (they always have plenty of drainage holes) and set that inside your pretty pot. Then take the nursery pot out when you water, and place it back into the decorative pot afterward.
You can find nursery pots in any size you need, and they don’t cost much.
Also, make sure you’re using a pot that’s the right size. It should be a maximum of 2 inches larger in diameter than your aloe’s root ball. In fact, aloe vera actually prefers crowded conditions, and erring on the side of slightly too small is usually a better bet than going too large.
RELATED: Do you think your aloe needs a new pot? We’ve put together a post of 9 of our favorite planters for aloe plants to give you some inspiration!
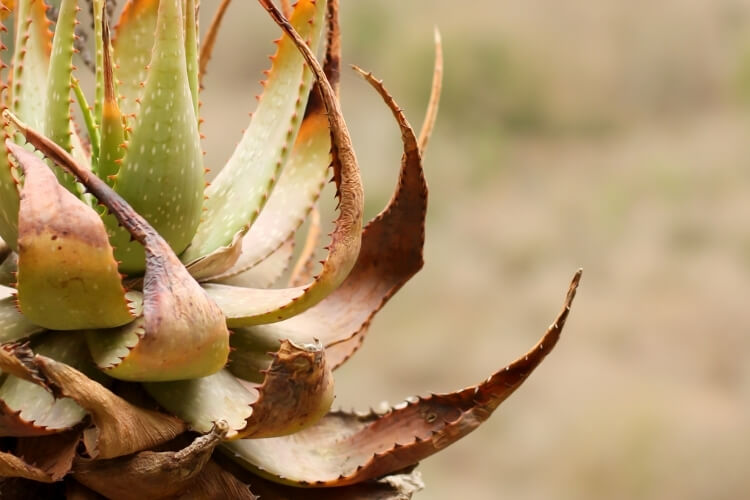
3. Underwatered Aloe Plant
I’ll admit it: I’ve killed a few succulents in my time. Since I was aware of the danger of overwatering, I made the mistake of watering too little.
The first place you’ll likely see the effects of under-watering is in the leaf tips. Since they’re the farthest away from the roots, they’re the last place to get hydration and nutrition. So if you spot crispy tips on your aloe, check the soil moisture right away.
If under-watering remains a problem, you’ll notice the leaves drooping, then wilting and shriveling up and finally turning brown before falling off completely.
We’ve discussed in a different post several reasons why your aloe plant might be drooping. Under-watering isn’t the only reason. Check it out to learn more!

How to Save It: Rehydrate and Adjust Watering Routine
If you catch the under-watering issues early enough (when just the tips are brown), give your aloe a good drenching right away. Make sure the water runs freely out of the pot’s drainage holes.
Then observe the reaction and check the soil moisture in a few days. If it feels totally dry again, give another moderate dose of water. Observe again, and water as needed.
However, if the dryness is severe, you’ll need to do an emergency rehydration. Although you normally want to be sparing with how much water you give your aloe, in this case, your plant is in crisis and drastic action is called for.
Here’s what to do:
- Get a bowl that’s larger than your aloe pot.
- Put the entire pot into the bowl and fill the bowl with enough water to submerge the bottom of the pot by a few inches. This allows your plant to absorb moisture through the pot’s drainage holes to hydrate the root ball’s base.
- Pour water over the top of the soil as well, to rehydrate the upper soil levels.
- Leave your plant soak in the water bowl for about 8 hours. Refill the water in the bowl as needed.
- After soaking your plant, remove it and place it away from direct sunlight to recover.
- Monitor your plant closely, and you should hopefully start seeing the leaves developing a firmer texture and more upright appearance within a couple of days.
- If any leaves have extensive damage, cut them off at the base of the plant.
Just like with preventing overwatering, it’s a good idea to use a log to help you figure out how often to aloe. Like I mentioned before, I try to water mine about every 10-14 days, and I’m looking for the soil to feel dry at least 2 inches down.
4. Too Cold
Being desert natives, aloe plants are not frost-hardy in the slightest. They can tolerate temperatures as low as 40 degrees Fahrenheit, but only for short amounts of time. Their ideal ambient temperature is 55-85 degrees Fahrenheit.
Too-cold temperatures can cause changes in the leaves turning yellow/brown and shriveling. If you keep your aloe in a chilly place for too long, it can’t absorb moisture and process nutrients. This will eventually lead to death.
How to Save It: Move Your Aloe to a Warmer Location
Make sure to keep your aloe plant far away from any drafty windows during the winter. If your windowsills get so cold that your plant can’t get enough light, supplement with a grow light.
And even in the summer, air-conditioning registers can create a too-cold microclimate. Move your plant away from strong vents, or use a register air deflector to direct the airflow away from your plant.
5. Harsh Sun Exposure
You’d think that as a succulent, aloe vera would like bright, hot sunlight. Although aloe vera does like a lot of light, it must be the right kind.
Too much harsh, direct sun could cause discoloration of your aloe’s leaves, turning them a sickly light green, yellow or brown. The damaged leaves can also lose their healthy, plump appearance and begin to wilt. What’s more, overly strong sunlight could dry your soil out faster than you realize.

How to Save It: Provide Filtered Light
Move your aloe plant someplace it will receive bright, indirect sunlight for at least three or four hours per day.
If you’re in the Northern Hemisphere, place your plant in an east-facing window to get the gentler morning rays. Or situate your plant back a few feet from a south or west-facing window to get the brightness but not the direct sun.
If you live in the Southern hemisphere, switch that to a west-facing window for morning sun, and a short distance back from north and east windows.
If you don’t have another window to move your plant to, consider putting up a sheer curtain to filter the light.
6. Too Much Shade
On the opposite end of the lighting issue is too much shade. While aloe doesn’t do well with strong sun exposure, it needs moderate light to produce its food through photosynthesis.
If your aloe isn’t getting enough sunlight its green color will fade and may turn yellow. Also, you might spot some skinny, stretched-out leaves as your plant desperately searches for any nearby sunlight.
How to Save It: Get More Light Exposure
Again, your aloe plant will do best in a spot where it’ll get at least three to four hours of bright, indirect sunlight every day.
If you can’t get that much sun from a window, use artificial light. I have an aloe plant in my basement office, where it gets almost no sunlight at all. But I do have overhead fluorescent lighting, and my plant is doing just fine!
RELATED: Looking for more suggestions of indoor plants that don’t need much sunlight? Visit our post on the best plants for windowless spaces!
Another option is to put a grow light on your aloe.
7. Overfeeding
Your aloe vera leaves are changing colors to red or yellow and the tips are getting burnt-looking. If this is happening in your home, your plant might be getting too much fertilizer.
It’s very tempting to give a dose of fertilizer to our houseplants often, with the intention of keeping them well-fed and happy.
But aloe vera is not a heavy-feeding plant at all, meaning that it doesn’t need much in the way of supplemental nutrition. Remember, aloe is adapted to harsh habitats where there aren’t abundant nutrients to absorb, so it’s learned to get by on very little.
Also, chemical fertilizers are made up of salts, which can be toxic to plants in large amounts. Any plant can suffer from overfeeding, but aloe is extra sensitive to these salt compounds, so it doesn’t take much before your aloe gets into distress.

How to Save It: Remove Excess Fertilizer and Reduce Future Feedings
Thoroughly flush the soil to wash away any retained salts. Take your aloe to the sink or bathtub and drench the soil four to five times in a row, each time until you see water running through the drainage holes.
Normally, you don’t want to give your aloe anywhere near this much water. But built-up fertilizer can do a lot of damage, so drastic steps are necessary.
After flushing the soil, set your plant out of direct sunlight and allow it to recover. Do not give any more water until the soil is dry at least 2 inches deep, and definitely don’t give any fertilizer. If there are any severely damaged leaves, cut them off at the base of the plant.
Your plant may continue to look rough for a few days, and it might even look worse immediately following your emergency measures. But be patient, and give your aloe the time it needs to regain its strength. Ideally, within a few days, you’ll see some signs of improvement.
For the future, scale back on your fertilizing schedule.
Use a balanced houseplant fertilizer diluted to half-strength, and always give plenty of water along with the fertilizer to prevent salts from building up in the soil. A liquid formula is the easiest to work with.
As long as you have your aloe in good potting soil, you shouldn’t have to give fertilizer more than once a year. If you’d like to help your aloe grow at the speediest pace possible (which still isn’t very fast), you can bump your fertilizer application up to a maximum of 2-3 times during the spring and summer months.
RELATED: Learn how fast aloe very grows and what you can do the help the process along!
8. Pest Attacks
Aloe vera is pretty resistant to pests, but it’s not immune. This is especially true if you keep your aloe outdoors.
The most common pests to plague an aloe are aphids, spider mites, mealybugs and scale insects. Here’s what they look like:


Some common signs of pests include:
- Bugs are visibly present on your plant (this is a dead giveaway!)
- Yellow or brown spots
- Leaves rolling
- Leaves turning brown
These pests suck the sap from stems and leaves, which is a plant’s lifeblood. If you don’t catch the problem in time, pests can weaken your aloe to the point of death.
How to Save It: Remove Pests and Prevent Future Infestations
Examine your aloe plant’s leaves and soil. If you see any pests, immediately remove your aloe away from any other houseplants, preferably into a separate room.
Spraying a strong stream of water (from the shower or a hose) is the typical recommendation for removing aphids and spider mites from a plant. However, aloe is very sensitive to moisture, so do not spray it down.
Instead, use a damp rag to wipe away as many bugs as possible, then apply insecticidal soap to kill any that remain.
Check your plant several times over the next few days, and spray more insecticidal soap if you spot any more pests.
If you see any mealybugs or scale, pick them off by hand or with a cotton swab dipped in alcohol. Then follow the same insecticidal soap protocol outlined above.
If any of your aloe’s leaves have been severely damaged by pests, trim them off at the base.
After there have been no signs of pests for several days, your aloe can rejoin its houseplant buddies.
Going forward, pest prevention is key. Clemson Cooperative Extension provides some great tips for avoiding problems with houseplant pests.
9. Poor Soil Conditions
Over time, the soil in any pot can become compacted from frequent watering and just the effects of gravity. And your aloe will have a harder time growing in dense soil since moisture can’t drain as freely and it’s harder for the tiny root tips to spread out.
If your soil has gotten to be in poor shape, you’ll see signs like these:
- Slowed growth
- Leaf color dulling
- Soil staying damp for longer than usual
How to Save It: Replace Old Soil with Fresh
Take your plant out of its pot, remove as much old soil as possible from the root ball and dump out all the old soil in the pot.
Then use a good-quality soil to refill your pot. Never use any soil labeled “topsoil” or “garden soil.” These products are far too heavy for potted plants, and you’ll just wind up with compacted soil again in a few days.
Specially formulated succulent soil will give you the best results. I use Espoma cactus mix soil with my aloe, and I’ve been pleased with it. Here’s what it looks like:


Notice how loose and light-textured it is. That’s what you want for fast drainage and good airflow.
If you can’t get succulent soil, regular houseplant potting mix is a second choice that will also work. But you must add some additional elements to produce the aeration and drainage that aloe craves. Here are some examples:
- Perlite (I like Perfect Plants brand)
- Orchid bark
- Sand
Whichever lightening ingredient you choose, mix one handful with potting soil for pots up to 6 inches in diameter. For larger pots, use at least two handfuls.
10. Your Aloe has Outgrown Its Pot
So your aloe is starting to look a little rough around the edges and there’s nothing amiss with the environment or your care routine. It could be that it has simply outgrown its current home and needs a little more space to stretch its roots out.
Here are some signs that your plant is ripe for repotting:
- You haven’t noticed any new growth lately, whereas your aloe was habitually producing a new leaf every few weeks.
- The leaves are starting to lose their deep green color for a lighter shade of green or yellow.
- You see some leaf drooping or wilting.
- Roots are peeking out from the soil surface or through the drainage hole.
- The soil dries out more rapidly than it used to.
- It’s been a year or longer since you’ve repotted, or you’ve never repotted your plant since getting it.
How to Save It: Repot into a Larger Container
Choose a pot that’s 1-2 inches larger in diameter than the current pot. Being careful not to damage the roots, remove your plant from its current pot. This is also a great time to inspect your aloe’s root system for any signs of root rot.
Gently open up any compacted root areas to help encourage new root formation. Put a couple of inches of soil in the new pot and settle your aloe in. Then fill in around the root ball.
Wait a couple of days before watering to help the roots spread out in search of moisture. If your plant experiences a little leaf droop or wilt, don’t worry- this is likely just a bit of transplant shock. Aloe can be sensitive to environmental changes, but it should bounce back in a few days.
RELATED: We’ve gone into greater detail on the repotting process in our post on how to repot a pothos. Even though it’s a different plant, the process is the same. So check it out to learn more details and see lots of helpful photos!
Frequently Asked Questions about Aloe Plants Dying
Final Thoughts
It’s never fun when your plant looks like it might be in trouble. But many times, you can prevent your aloe plant dying with some simple changes to your care routine.
The soil moisture and your watering habits should always be the first thing you check. If there are no problems there, troubleshoot for other issues. Once you figure out watering, feeding, pots, sunlight and temperature, aloe is pretty low-maintenance and just a great houseplant to have around.
We’d love to hear from you! What problems are you facing with your aloe plant? Have you discovered any helpful tricks you’d like to share?
Let us know in the comments!