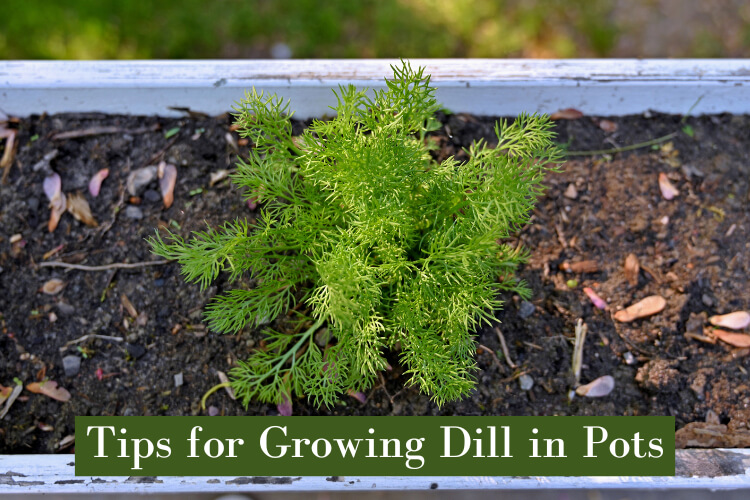
Dill pickles, fish seasoning, mixed-herb cream cheese- growing dill in pots is one of my favorite ways to keep a steady supply of fresh dill on hand whenever I need it. But you do need to know a few tricks to get a healthy, productive crop in a container garden.
For growing dill in pots, start with seeds or stem cuttings of a compact or dwarf dill variety. Since dill forms a long taproot, choose a pot that’s at least 12 inches tall and has good bottom drainage. Use loamy soil that drains well, water when the top 1-2 inches of soil are dry, and ensure full sun for 6 or more hours per day. Stake dill plants when they reach 12 inches in height to support the delicate branches.
In my experience, dill is not a high-maintenance plant. Once you meet a few environmental needs for optimal dill growth, it usually gets along well even with minimal attention from you.
In this post, I’ll outline how to choose the right dill variety for growing in pots, how to get your dill plants started and how to care for them throughout the growing season.
Let’s get started!
Table of Contents
Best Dill Varieties to Grow in Pots
Can you grow dill in a pot? Yes- but not every cultivar of dill is a good choice for container gardening.
Some varieties, like elephant dill, can reach up to 4 feet in height and develop a taproot that’s at least 12 inches long. So you’re much better off keeping these larger varieties in the ground and sticking with compact cultivars in your pots and containers.
But don’t worry- that still leaves you plenty of options to choose from. Here are some dwarf and compact varieties that are ideal for growing in pots:
- Delikat: 10-24” in height
- Hera: 12-18” in height
- Compatto: 12-18” in height
- Dukat: 12-24” in height
- Fernleaf: 18” in height
- Bouquet: 26-36” in height
When it comes to how many dill plants per container you should plan for, use the size of the variety you choose be your guide. For very small varieties, like Delikat or Hera, you should be able to fit two plants in a pot that’s 12 inches in diameter. For the larger varieties, such as Fernleaf and Bouquet, keep it to one plant per pot.
Supplies for Growing Dill in Pots
You don’t need much in the way of supplies for your container dill plants! Here’s what you need to have ready:
Choose the Correct Pot
All dill varieties grow a long taproot- it’s a survival feature that allows them to search out moisture in the soil, making dill a drought-resistant plant. To accommodate this long taproot, choose the deepest pot you can find, at least 12 inches tall.
Dill also forms lateral roots that reach outwards, and the plants themselves tend to spread their branches out. So use a pot that’s 10-12 inches wide to give your dill the space it needs.
Another key feature of a pot is good bottom drainage. Make sure the pot you use has at least one large drainage hole to allow excess water to escape.
Important Note: Dill seedlings do not transplant well due to their taproots, so you need to start out with the right pot for the best results. Choosing the correct container is essential for successfully growing dill in pots- so don’t just grab an empty one you have in the garage.
Use Well-Draining Soil
Dill does not do well in heavy, wet soil. Do not use anything labeled “topsoil” or “garden soil” for container plants- these products are meant for mixing into ground soil in the garden, and they will just turn into a compacted block in pots.
Instead, choose a light, fast-draining potting soil, and mix in some compost, well-aged manure or other organic matter for extra richness.
Getting Container Dill Plants Started
Starting off right is the best way to get a bountiful harvest from healthy dill plants. As I mentioned earlier, dill doesn’t do well with having its taproot disturbed, so transplanting dill seedlings typically isn’t very successful.
So that leaves you with two options for getting dill plants started:
- Seed
- Stem cuttings
1. Growing Dill from Seed
Starting from seed is by far the easiest and most successful method of growing dill in pots.

Here’s how to plant dill seeds in a pot:
- Scatter a few dill seeds around the center of the container. Allow for a 1-inch space between the seeds and the edge of the pot.
- Cover the seeds with a thin layer of potting soil, about 1/4 to 1/2 deep.
- Water to keep soil moist and place the container in full sun or under a grow light for at least 6 hours daily. Seedlings should emerge within 1 to 3 weeks.
- Thin out the seedlings to 1-2 per pot when they reach 4 inches in height by cutting off weak seedlings at the base of the stems. Don’t try pulling out seedlings- you risk damaging delicate roots of the stronger seedlings.
2. Growing Dill from Cuttings
You can also grow dill from stem cuttings taken from a healthy dill plant in spring or early summer when temperatures aren’t hot.
Choose a branch that’s at least 4 inches long with new growth, then place the cuttings in water on a warm, sunny windowsill. New roots should emerge from the nodes in a few days, although it could take up to a couple of weeks. Once the new roots are 1-2 inches long and the cutting is putting out some new leaf growth, it’s ready to be transplanted into your pot.
I’ve covered the process of taking dill cuttings, getting them to root and caring for them afterwards in greater detail in my post on starting dill from cuttings. So stop by to learn more!
When to Plant Dill in Pots
Dill does not tolerate frost well, so wait until all danger of frost has passed for your region before planting your dill outdoors. See this map from the National Centers for Environmental Information for the last projected spring freeze dates in your area.
If you want to get a head start, you can also start your dill indoors under a grow light in early or mid-spring. Then harden off the seedlings and move them outdoors when the temperatures are consistently above 50 degrees Fahrenheit.
How to Care for Dill in Pots
While dill is a pretty low-maintenance crop, I’ve found that it needs a little more attention when you’re growing it in a container. Here’s what to do to keep your potted dill plants happy:
Watering
Dill likes soil that’s consistently moist but not boggy. You’ll have to tailor your watering routine a bit depending on your plants’ maturity:
- Keep soil moist until seedlings reach 3-4 inches. A watering can with a sprinkler attachment is a good tool here.
- Once seedlings are 3-4 inches tall, allow the top 1 inch of soil to dry out before watering again. Check soil moisture with your finger- if the soil sticks to your skin, it’s not time for watering.
- When the dill reaches 6-8 inches in height, wait until the top 2 inches of soil are dried out. By this point, the moisture-seeking taproot is better developed and you can back off on your watering frequency.
Lighting
Dill grows best in direct sunlight for 6 or more hours of sunlight per day. One of the best aspects of potted plants is that you can move them if needed, so feel free to experiment with locations.
Pest Control
Dill attracts beneficial insects, and it also has natural pest-repelling properties- that’s one reason to consider companion planting with dill in the garden.
However, dill is not immune to its own pests. Just like dill planted in the garden, container dill plants can also attract hornworms, aphids and armyworms. Here’s what to do about pests on potted dill:
- Inspect your plant regularly for pests and remove them by hand if you notice them.
- Make pest spray by mixing ½ teaspoon of mild Castille soap, 1 tablespoon of baking soda, and 2 ½ tablespoons of olive oil in 1 gallon of water. Spray the solution weekly to prevent insects on your dill in pots.
- Commercial neem oil is another good option for keeping pests at bay.
Note: Dill, like other members of the carrot family, is a favorite host plant and food source for swallowtail butterfly caterpillars.

Since butterflies are important pollinators and are on the decline, these caterpillars aren’t pests. But they can eat through quite a bit of dill foliage, leaving weakened plants in their wake.
A couple of solutions are to plant more dill to make up for the lost harvest or plant other suitable swallowtail caterpillar food sources. Parsley, carrots and fennel are good choices. This video from Observing Nature demonstrates the relocation process:
Temperature
When planted in the ground, dill is cold-hardy down to 25 degrees F for brief periods. But growing dill in pots is a different story since you don’t have the benefit of the earth’s natural warmth.
Potted dill does best when temperatures are consistently between 65 and 75 degrees F, but it can also tolerate warmer temperatures as long as you keep the soil moist.
Fertilizing
Dill is not an especially heavy-feeding plant, but it will appreciate a nutrient boost every month or two during the spring and summer. A balanced vegetable/herb fertilizer is a perfect choice, and I always recommend organic formulas for edible crops.
Support
Dill has a naturally light, branching growth pattern, and it can benefit from outside support in some cases. According to The University of Minnesota Extension, provide support with a stake once the dill reaches 1 foot in height.
Harvesting Dill in Pots
Dill is ripe for harvest once it’s at least 8 inches tall and each branch has at least 4 leaves. According to Penn State University Extension, it usually takes about 90 days after planting seeds for dill to be harvest-ready.
Use sharp scissors or gardening shears to clip dill below leaf junctures, being careful not to harvest more than a third of the plant at a time. For more detailed information and instructions on harvesting dill the right way, read our article on how to harvest dill.
Fresh dill can be used for up to 2 weeks. If you dry it, dill is good for up to 3 years.

Frequently Asked Questions about Growing Dill in Pots
Final Thoughts
A lack of space doesn’t have to stand in the way of enjoying fresh, healthy dill. Growing dill in pots is easy and very low-maintenance, and in my opinion, it’s awesome to just step outside the door and clip some fresh dill for whatever recipe I’m making.
I’d love to hear from you! Do you have any other questions about growing dill in pots, or any helpful tips to share? We learn best as a gardening community, so please share in the comments!