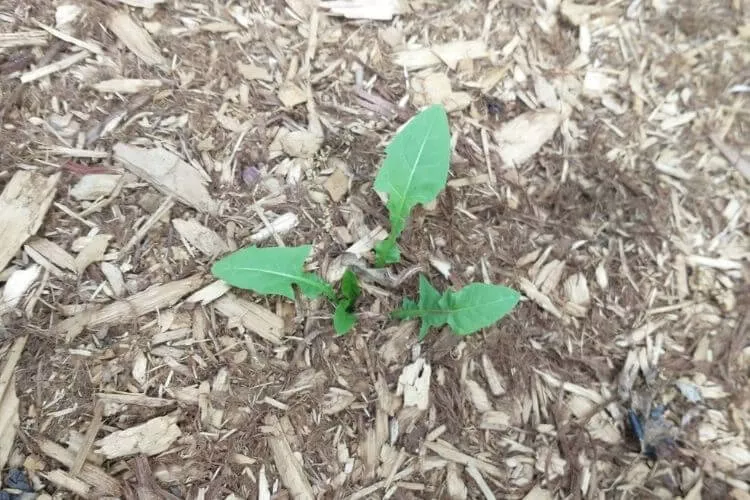
It’s happened to all of us. You choose the perfect mulch and spend time and energy spreading it around your trees, shrubs and flowers. And then you see it: A weed.
Weeds spring up so quickly because they’re plants with a natural ability to spread easily and grow with little resources or nutrients. You’ve got a few options to address pesky weeds:
- Preventing new weed growth
- Creating a barrier to discourage weed spread
- Removing existing weeds
- Chemical herbicides
In this article, you’ll learn how to stop weeds from growing in mulch with each of these strategies. We’ll also answer some common questions about mulch and weeds
RELATED: Learn about all the best types of mulch you can use in your garden or landscape!
Table of Contents
1. Prevention: The Gold Standard
It may sound cliché, but the truth is that the best offense is a good defense.
Preparing the area before you spread the first shred of mulch will always yield the best and longest-lasting results.
Disturb the Soil as Little as Possible
Even though I know that many people like to till their ground to prep it for mulch, that’s actually not your best strategy most of the time.
In fact, tilling may actually increase the number of weeds you see growing in your mulch.
Weed seeds are present both on the soil surface and deeper within the soil itself. Tilling turns up the top several inches of soil, bringing these buried, dormant seeds up to the surface.
Now that they’re near the sunshine they need to germinate, they’ll take the first opportunity to spring up through your mulch.
So remove all existing weeds from your soon-to-be-mulched area as possible, then skip tilling altogether and let these dormant seeds be.
Apply a Fabric Weed Barrier
Now that your ground is clear of visible weeds, lay down a fabric weed barrier to block sunlight and keep new weeds from sprouting.
Shortly after we bought our house, we redid the front beds. We used clear plastic (not fabric) as a weed barrier, and while it’s been effective for the last 10 years, I wouldn’t choose it again, for a few reasons:
- It can trap heat (especially black plastic), potentially overheating plants.
- It doesn’t allow any moisture through, so it keeps needed water away from roots, and it can also block excessive water from evaporating.
- It can be hard to cut through to add a new plant down the line.
Instead, I would go with a fabric barrier. Fabric is far more breathable, lighter and easier to work with over the long term.
If you’re creating a brand-new bed, lay your fabric down smoothly over your prepared ground. Then use fabric tacks to secure it in place.
If you’ve got established flowers or small shrubs to work around, cut x-shaped holes that fit around each plant. Lay the fabric down around the plants, and tack it down.
For larger bushes and trees, use strips of fabric to surround the trunk. Make sure to overlap the strip edges, and use plenty of tacks.
Amazon offers landscaping fabric in both rolls and sheets, and you can get fabric tacks there too.
Use Pre-Emergent Weed Control
Pre-emergents are chemicals that stop weeds from germinating. To learn more about the specific mechanism these products use to prevent weeds, the NC State Extension covers it in detail.
There are a variety of formulas to choose from, including those that target grass and others that more broad coverage.
Here are a few of the options from Amazon:
- Scott’s Weedex: Effective against crabgrass
- The Andersons Barricade Professional: Extra-strength, broad-spectrum application
- Espoma Weed Preventer: Organic option with corn gluten as the active ingredient
I try to avoid harsh chemicals whenever possible (we’ll talk about this more a little later on). I would personally choose the Espoma formula.
Whichever formula you choose, follow the application directions carefully. Some require pre-watering your ground to activate the ingredients.
2. Install an Edging Barrier Around Mulched Beds
An edging barrier is nice for a couple of reasons:
- It provides a nice, finished look to your mulched beds.
- It can help keep weeds growing nearby from spreading their roots into your mulch.
But while a barrier is effective against root spread, keep in mind that it won’t stop weed seeds that travel by air. Dandelions are a perfect example.
You’ve got a few options for adding an edging barrier:
- Trench
- Vinyl
- Wood
- Stone
Trench
This is the simplest type of edging barrier. To make one, slice through the grass around your bed and dig a trench about 3 inches deep and about 3 inches wide.
That’s all there is to it. As another benefit to a trench barrier, it’s easy to mow around.

But you will need to spend time in regular maintenance to keep your trench looking sharp. That can include pulling weeds, building up crumbling areas or removing stray pieces of mulch.
Vinyl
This is the pre-made stuff you see at the home improvement store or online. It’s fairly inexpensive and simple to install, and it does a great job of following curving lines.

But vinyl can’t make for clean corners, so it’s not the right choice if you have sharp angles to work around.
Wood
A wood border looks amazing and will hold up for years or even decades.
This particular one in the photo is over 35 years old!

However, wood is expensive and installation can be a challenge, especially if you’re working with heavy railroad ties.
Stone
These could be landscaping pavers that you buy at the home improvement store or nursery. We used landscape pavers for a raised border, and we really like them.

For a more natural look, you could also collect your own stones from a lakeshore or riverbed.
Either way, stone is wonderfully long-lasting and looks great. But if there are seams or gaps between your stones, they may let weeds sneak through.
3. Manually Remove Existing Weeds
One of the simplest solutions to stop weeds from growing in mulch is to just pull them.
It can be tedious work, for sure. But these tips can help:
Pull weeds out by the roots. Isn’t it tempting to just yank off the portion of the weed that you can see above ground and call it a day?
But this often leads to weeds growing right back, especially dandelions. Using a specialized weeding tool helps you pull the entire plant, root system and all, in one go.
Do your weeding when the soil is damp. Whether it’s after a rain or you manually watered, it’s easier to pull weed roots out of damp, soft earth.
4. Chemical Herbicides
I am not a fan of chemical solutions, and I only include them as a last resort.
However, they are indeed effective. If you do choose to use an herbicide, I recommend using an organic or naturally-derived formula and keeping the application as sparse as possible.
Some organic options include salt, vinegar, surfactants and other natural elements. This formula from Doctor Kirchner could be a good option.
You could also make homemade weed killers with similar ingredients. North Dakota State University provides this recipe.
But I want to stress that even though an herbicide may be “natural,” that doesn’t automatically make it safe and harmless.
Especially if you use them repeatedly, vinegar, salt and soap can disrupt normal soil balance and plant growth, and they can leave lasting impacts on friendly plants and insects.
This article in Kitsap Sun does a great job of outlining the safe and effective use of homemade and natural weed killers.
To properly use any commercial herbicide, pay attention to the following tips:
- READ THE LABEL. This is perhaps the most important tip I can give you. Knowing what the label says can help you safely and properly use it.
- Use the right protection. This includes not having open-toed shoes, wearing gloves and eye protection.
- Don’t reuse anything that has touched the herbicide such as containers.
- Only mix what you need for immediate use.
- Don’t go near the sprayed area until it is safe, per the instructions. This includes keeping any and all pets away. There is no set timeline, and you should read your specific herbicide for this information.
- Store where it won’t be reached and keep it in the original packaging.
What Kind of Mulch is the Most Weed-Resistant?
Wood mulch tends to harbor the fewest weeds. This true whether you use heartwood chips or bark shreds.
Cedar and cypress in particular can be good choices. Both of these woods have natural chemical compounds that can slow some weeds from germinating and growing.
RELATED: Visit our posts on cedar mulch and cypress mulch to learn more about each one!
That doesn’t mean that weeds won’t still find their way into cedar or cypress mulch, though. I’ve got cedar mulch, and I still need to pull weeds out occasionally.
On the other hand, rock mulch typically seems to be the worst offender for allowing weeds to spring through.
Frequently Asked Questions About Weeds Growing in Mulch
Final Thoughts
While weeds can be a hassle, a little extra care beforehand and in routine upkeep can go a long to stop grass and weeds from in mulch for the long term.
Remember the strategies:
- Prevention
- Edging barrier
- Removal
- Chemical herbicides
Use some or all of these, and your mulch should be looking good!
Do you have any other about keeping weeds out of mulch? Are there any other tips you’d like to share?
Let us know in the comments!